Monday 10 July 2017

27 MONTHS OF LITHO

I have just finished my 27 month residency at Leicester Print Workshop (LPW) and thought this would be a good opportunity to recap on what Ive done over the past few years.
Since April 2015, I have attended LPW 220 times, approximately 2- 3 times a week for 7- 8 hours a day !
I am extremely grateful to have received 2 grants to help finance this project, one from the Arts Council of England and the other from the Elizabeth Greenshields Foundation. These grants enabled me to make the 140 mile return trip by train rather than driving.
I have enjoyed the Fellowship immensely, it has been an incredible opportunity to make a new body of work in a different medium and to learn a new discipline. One of the best things about the experience has been being part of the LPW community.  LPW is a special place, with over 180 members and is a really friendly and supportive environment in which to work. Throughout my 2 years there, there have been many opportunities to engage and share learning with other artists using the workshop and the critical support and friendships made through these interactions have benefitted me enormously both personally and professionally.

I would like to say a massive thanks to all the LPW staff and members but particularly to Lucy Phillips Director of Leicester Print Workshop and of course to Serena Smith for sharing her vast wealth of lithography knowledge and for being endlessly patient! Huge thanks as well to Nina who has been such a great colleague to share this journey with.

So to recap what Ive been up to:

I have worked on over 20 stones, from quite large ones to small graining ones. I have experimented with registering multiple stones, using photolithoplates, adding colour by means of monoprinting, chine colle, collage and hand colouring. I have experimented using different greasy materials from crayon, pencil, rubbing block to watery tusches and ink and used frottage, masking tapes, transfer paper and sgraffitto. I have printed on to a variety of different papers and collaged prints on to concrete.
Ironically (and not intentionally!)  the first stone I worked on involved a tree as did the last ones.
Here are some of the prints Ive made and stones Ive worked on:

        First print I made using dry and liquid tusches and transparent monoprints for colour


                      First  small stone made using masking masking tapes - not a great success!!


            First stone made using a combination of above 2 techniques - (masking tapes, variety of                                                               dry and more liquid tusches)


                             Two stones registered together to produce a print with greater tonality


                             Resulting print with multiple monoprints added to give colour


                                                                  Small graining stone


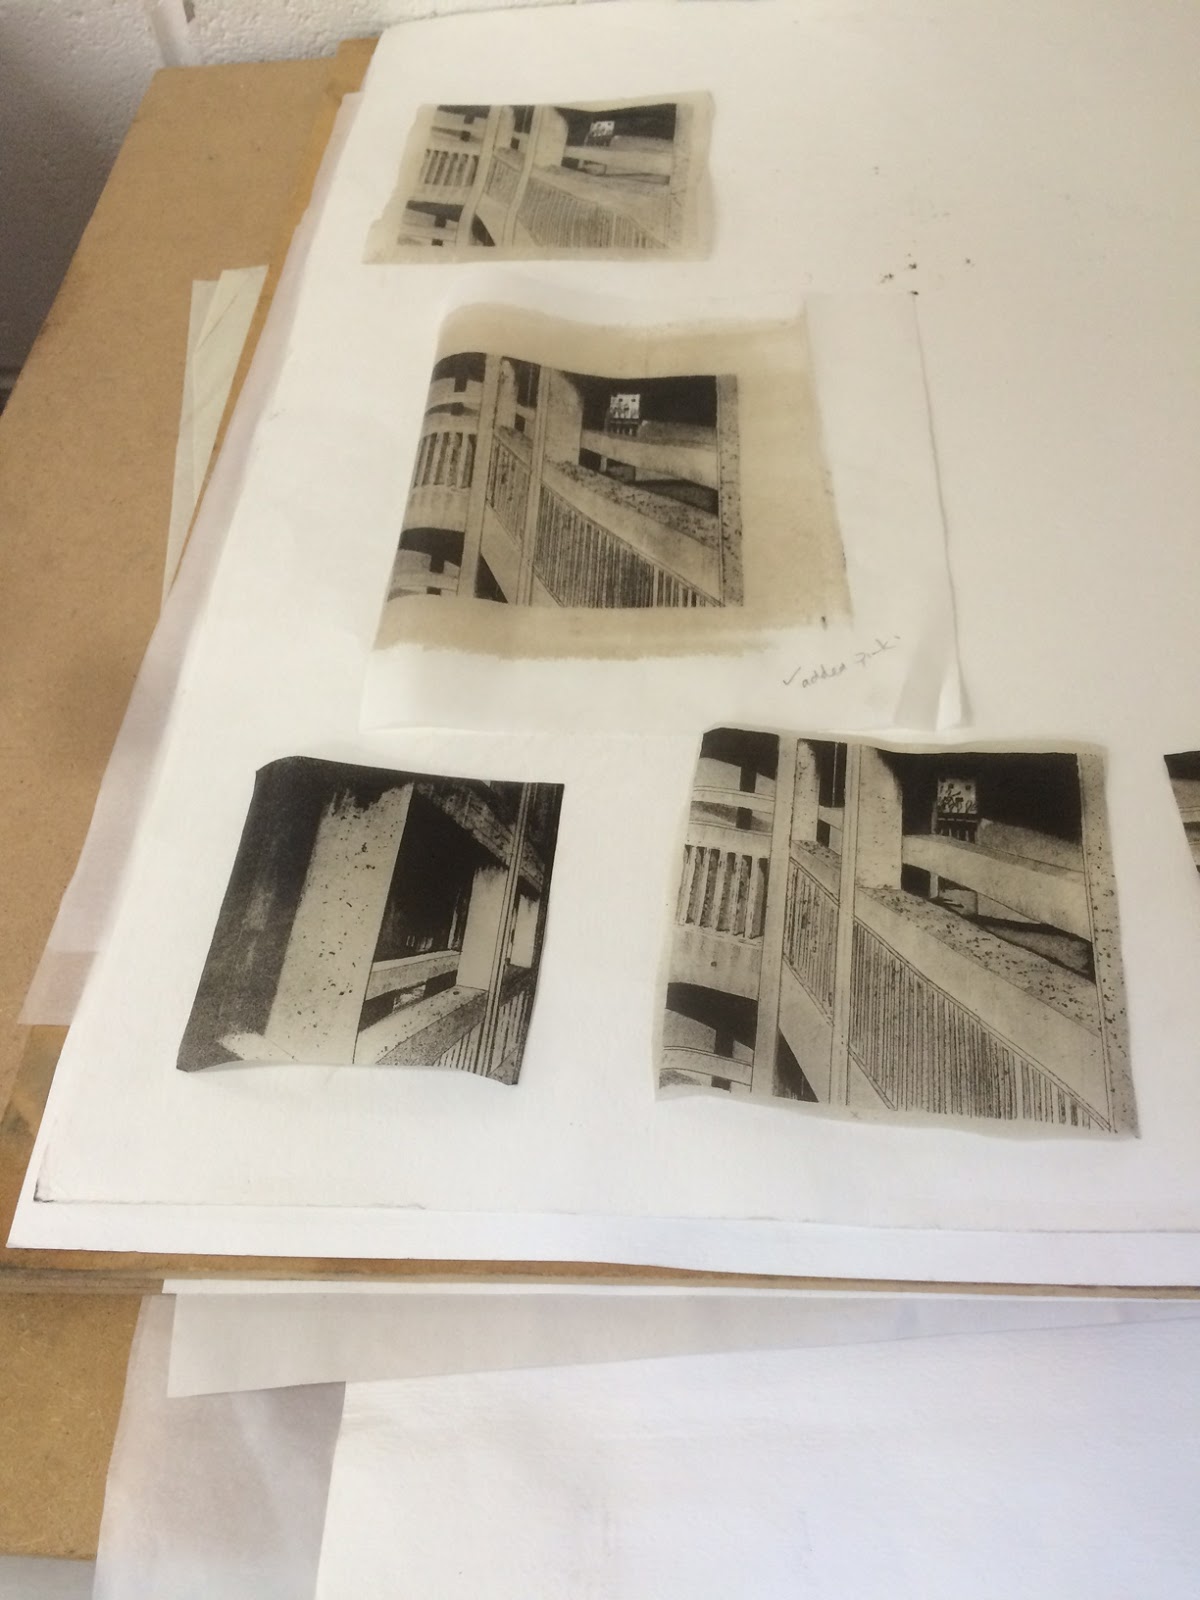
                        Resulting lithograph collaged on to Japanes paper and then on to concrete


                    Another large stone using a combination of dry and liquid tusches and tapes


                                             The resulting prints on paper (with monoprint)


                                Then printed onto Japanese paper, then collaged onto concrete

       
         Other examples of  lithographs printed onto Japanese paper and then collaged on concrete


Lithography is not without its trials and tribulations - I think this was one of the most dramatic events that happened during the process! Fortunately I was still able to take prints fro it


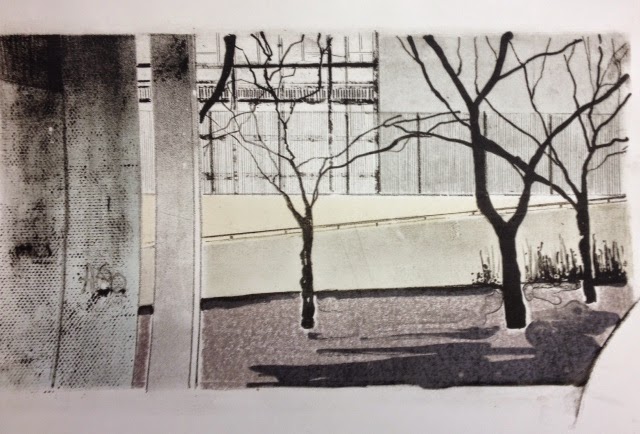
Here is one printed on paper with multiple monoprints added for colour and tone


And here is one on Japanese paper with monoprints and collage that has been stuck on concrete


My very last stones that I processed were done with liquid tusche (something I would like to experiment more with). They were both of the same subject (an old tree stump) but one was more drawn into than the other. I was glad I did two as I over etched the first one!


It has been a steep learning curve trying to master lithography but I can see the progress Ive made since I started. I am keen for lithography to remain a big part of my arts practice and after a short break aim to try to attend LPW once a week so as not to lose the skills Ive learnt.
Nina and I will be having an exhibition of the work we have made during our Fellowship which will run from November 4th 2017 - 11th January 2018 at Leicester Print Workshop. We are also involved in another exhibition  at the Tarpey Gallery, Castle Donnington will show our work and that of the 2 previous recipents of the Lithography Fellowship, Kate Desforges and Soraya Smithson and Serena Smith who taught us all. That exhibition will run from September 30th - October 22nd 2017 (opens 30/09/17  - 6 - 8pm)  All welcome!

Saturday 25 March 2017

March 2017

MOKULITO
Mokulito is lithography on wood instead of stone - it was discovered by Prof Seishi Ozaku in Japan over 30 years ago.It combines both lithographic and woodcut marks and doesnt need any strong acids or solvents unlike traditional lithography. There are lots of good u tube videos on line about the process including several by the  polish artist Ewa Budka from East London Printmakers who has been researching the process for several years.
My colleague Nina has been experimenting with the process a bit too and has achieved some interesting resukts so I thought it was time I had a go too.
So using a piece of plywood I:
1. Sanded the plywood down
2. Nina had found lithographic ink and crayon worked better than watery tusche -The plywood was drawn on and I also gouged into it to create white marks
3. The drawing was left to dry and rest for a few hours and then chalked and gummed and left
overnight
4. The gum was then washed off with water and the wood kept damp using damping cloths
5.. A  really runny ink (50% litho ink :50% plate oil) was rolled onto the damp plate very quickly.
(a foam disposable decorating roller was used rather than a traditional glazed roller)
6.. The plate was dried and then a thin piece of slightly dampened Japanese  /Hahnemuhle paper was placed over the plate and then the whole lot run through the etching press.
8. In total about 6-8 proofs (of variable quality !) were produced before the plate became too messy / unusable.

I liked the way the wooden grain was picked up and the marks that the lithographic ink produced and it was a much quicker, freer, experimental/ (but also inconsistent !) process compared to traditional stone lithography and best still - no graining! However I think I prefer the detail and more reliable marks achievable with stone (although maybe I just need more practice?)

Heres my plate (I had visited the Robin Hood Gardens Estate in Poplar recently which was my inspiration)


And the subsequent print:


January /February /March 2017
Over the past few months I have been trying to edition stones prior to finally getting rid of the images by graining. This is 'Stripped Bare',  I printed off 10 proofs onto Japanese Kozo paper then block printed a gold- green coloured transparent ink (containing plenty of extender). The ink was rolled on to a pre cut photo -lithoplate and then placed on to each proof and rolled through the etching press to transfer the ink to the paper.
Here is a finished test print: (for the final edition I went for a slightly greener block print)


I then decided to crop the image and then using the starch paste that is described in my 4/3/16 blog post I stuck the prints onto individual concrete tiles that I had made earlier. The prints were protected with several coats of archival uv resistant varnish. I am hoping to have an edition of 8. Here is the finished piece framed


I also proofed an edition of 10 of my Faded Glory print on to Kozo paper and on a slightly smaller concrete tile using the same starch paste method. Here is one of the finished framed prints:


Finally, having my editioning head on I aimed to try and get an edition of 8 of the Liminal Zone print on Somerset Newsprint paper. This proved to be quite a challenge as the stone hadnt been opened for a while and the first proofs taken were quite pale and blotchy. To try and remedy this a layer of asthphaltum was rubbed over the stone and then the stone rolled with a thin layer of noir a monter ink and 10 proofs taken.


The proofs were printed on to Somerset newsprint paper. Once the ink was dry the paper was dampened and a blockprint similar to the Stripped Back proof was added. A piece of photo lithoplate was cut to the image size and a thin translucent ink (with lots of extender) mixed


This was rolled on to the photolithoplate and then the plate placed over the dampened image and the whole lot run through the etching press. Here is the finished proof.


I also started a couple of new stones: 

Here they are finished:


The first stone I printed 10 proofs onto Japanese paper and once the ink had dried I blockprinted a thin layer of transulucent ink rolled on to a photolithoplate . Allowing for some mistakes I made an edition of 8 - here they are drying. I plan to collage them on concrete as before.


For the second stone I made 10 proofs printing again onto Japanese paper. I then cut multiple small pieces of varnished card to fit the different areas of colour on the print. Using lots of extender I rolled 9 different coloured inks onto the apprpropriate piece of card and then placed them on the print and ran it through an etching press, Here is one of the finished proofs collaged on to concrete and framed:


Friday 30 December 2016

Stones worked on from August - December 2016

I have been a bit idle on the blog front over the past few months so thought I'd share what I've been up to lately..
I have been working on some more small graining stones (approx 20 cm square) - largely because they are portable (ish!) so I can cart them home in my rucksack and work on them in my studio. I have then printed the images onto Japanese Kozo paper back at Leicester Print Workshop which I will then transfer on to small squares of pre-cast concrete back in my studio in Sheffield.
The images were largely made with dry materials (crayon/ rubbing block) and selective use of litho ink. Fine lines were achieved by scratching lines in at the second etch stage and rubbing litho ink to the incised grooves.


Stone (above) and printed image below


Stone above and print below


Here's the first small print I made (discussed in a previous blog) pasted with starch paste onto a small slab of pre-cast concrete and then framed to show what I am planning to do with the above prints.


I also attempted a maniere noir stone - this involves covering the stone with a thin layer of litho ink and scratching into it to expose the bare stone - a bit like a mezzotint. Tonal differences were achieved by treating the inked areas with different strengths of acid. This stone was largely experimental and not that successful as I found the fine lines that I had incised kept filling up with ink and were thus not very visible! It may have worked better if I had tried working on a bigger scale so the lines were not so fine. Here's the stone anyway so hopefully you will get the idea ...!


Finally I have been working on 2 larger stones.
The first was a quite detailed image made using masking tapes, dry materials, lithographic ink and watery tusches. Here is the finished stone:


I did have some problems with this stone as unfortunately the previous image had not been completely removed from the stone when grained and kept reappearing! I was largely able to etch these areas back but it was a bit of a nuisance and reinforced the necessity to ensure that the stone is properly grained each time!
Here is the printed image - I also printed a very pale tint on the dried print. This was done by mixing litho ink extender with a very small amount of mixed beige coloured ink, rolling it on a very thin piece of aluminium cut to slightly bigger than the image size, placing it on the lithographic print and running it through the etching press. Here is the finished print:


Lastly the final stone I have been working on is a bit less complicated and was done using masking tapes, litho ink and rubbing block. Fine lines were achieved by scratching into the stone and rubbing ink into the incised grooves at the second etch stage. Here's the stone :


and the finished image, (again a tint was placed using the same method as above by rolling ink and extender onto aluminium plate and monoprinting it onto the dried lithographic black and white print)


Saturday 13 August 2016

LPW Lithography Summer school

I have been a bit quiet on the blogging front lately - largely because I have spent the past few months editioning a few of my stones and then graining them to remove the images - so not that much new to report!
During the last week of July Leicester Print Workshop was closed to members as it was running a Summer School offering 3 different print courses in letterpress (run by Sat Kalsi), etching (run by Sue Baker Kenton) and stone lithography run by Serena Smith.
The courses ran from Monday to Friday giving an opportunity for participants to immerse themselves in a printing technique in small groups of 6. I shadowed the stone lithography course and thought Id share with you some of the things the group got up to and the work they produced.
Out of the 6 participants, 5 had had some experience of lithography before (indeed one of the group had even brought one of the stones he had prepared earlier to process!). Several of the group were already members of LPW and most were local to Leicester however, one lady had travelled from as far away as Suffolk to attend.
The first day was spent with Serena explaining the lithography process and demonstrating different mark making materials - dry tusches (rubbing blocks, litho crayons etc) and  then liquid tusches, litho inks and soap solutions. Processing of the stone and first etches were shown and the group were then given several test stones to experiment mark making with. 


Trying out Korns' and Stones' liquid tusches on test stone


Serena first etching test stone


Here are some of the group working on their test stones


and some close ups of the marks made:


The next days were spent further processing the test stones - second etching and proofing 


Serena rolling up test stone with Noir a Monter ink to process it


 here are some of the prints produced from their test stones


In between leaving stones to rest and proofing partcipants were also shown the graining technique (to remove the image when further prints are no longer required in order to re-use the stone again)


The wonderful Elspeth who spent many extra hours graining stones!


After processing their test stones the group were given a larger stone in order to put into practice the mark making experience gained - Here are some of their results!


All in all I think everyone had a really good week - there was a lot of information to impart and absorb in a short space of time but the whole group produced some amazing prints and I think many of them really had their appetite whetted to explore this wonderful process further. (Indeed all the members of the group who were LPW members have returned to continue working with their stones since the course finished!) On a personal note I really enjoyed the week - it refreshed my knowledge and has inspired me to use different materials in my own practice.