Saturday, 5 March 2016

3rd/4th March - LEICESTER PRINTWORKSHOP SMALL PRINT INTERNATIONAL COMPETITION

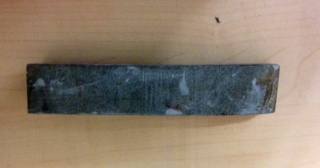
Started a new small stone -with a view to possibly entering it into the Leicester Print workshop Small Print International . This competition invites entries of prints that have an image area of less than 100cm2 printed on paper less than 500cm2.  (Further details can be found at www.leicesterprintworkshop.com)
I thought I'd have a go at submitting a stone lithograph - (which could be problematic on two counts)
1.  The deadline is in less than 3 weeks time (!)
2. I am used to working on quite a large scale with the stone lithographs and so to work to such a small size will be challenging to say the least - (however after nearly a year of trying to get my head round stone lithography I am used to a challenge...!)

I decided to use one of the small graining stones that we use to clean off the images from the larger stones.
I used litho ink diluted with turps for the dense black areas - rubbing block and litho crayons for the mid tone areas. The speckled areas were created by dusting shavings from a sharpened litho crayon on to the stone then warming the area with a hair dryer and burnishing them with the back of a spoon under newsprint - not sure how they will print!

Here's where Im up to with it so far - (still got some more fine lines and detail to add in yet).


25th/26th February


Took several proofs from the second stone (see below) 


on to the prints from the first stone (see below) that I had made on Fabriano Rosepina paper


The idea being that the resulting print would give a greater depth of tone and different inking methods -that wouldnt have been able to have been achieved by using just one stone

I tried to register the prints from the first stone on the second stone - but frustratingly I hadnt given myself much leeway and they were slightly out ..... - Serena (my tutor) showed a way of making registration more accurate. She turned one of the prints overleaf and placed it on a light box - a vertical line from the print where the mis registration was consistently occurring  was registered in pencil on the back of the print.
On the stone the same vertical line was found on the image and a heavy ruler laid on the inked stone - (newsprint was placed on the stone first so that the print didnt pick up any miscellaneous ink as it was orientated.) The line that had been drawn on the back of the print was placed  so that it was in line with the ruler on the stone - the centre lines were then located on the print and the stone -and the print taken using velvet noir and burnt umber ink - it was still slightly out !! - 
Serena suggested we tried another means of registering - this involved taking the first print and the cad foil that we used for registration and making sure they were lined up - scalpel cuts were made in the print where the centre lines corresponded with the cad foil - The worse areas of mis- registration were in the concrete pillar areas so thin strips of tissue paper were also cut and stuck to the prints before the second print was taken as a mask - this seemed to work well!

Heres one of the more successful prints (I am not going to show some of the others !)


Serena also suggested softly deleting some of the areas that we were having problems with with pumice and wet and dry paper. This was done in the areas of the white columns of the print-(see below) the idea being that I would  to print up again at a later date to see if things improved


Friday, 4 March 2016

17th / 18th February 2016 
MORE PROOFING AND HOME MADE STARCH PASTE FOR COLLAGING PRINTS


More proofs were taken from the first stone using Non Drying black ink on Fabriano Rosepina paper so that I would have more prints to experiment registration with! I had previously exhausted my supply of prints that I had originally taken with trying to register the second stone last week! 


I also took 6 prints of the small stone shown below using the same ink on Japanese paper


I had an idea to try and stick these small prints on to some concrete slabs that I had made earlier (this may sound a bit random but my painting practice involves painting on similar slabs of concrete and I have an exhibition coming up soon and thought this might be a good way of displaying paintings and prints together).


Serena my tutor showed me a method of making a glue paste to achieve this out of flour and water.
One teaspoon of flour was mixed with a small amount of water to make a smooth lump free slurry. A small amount of boiling water (about an inch in the jug) was added which thickened the mix.  Cold water was then added to thin the glue so it became the same consistency as milk. 


The edges of the print and the concrete tile were 
drawn on a piece of cadfoil to position them and then the print was placed image downwards on the cadfoil and the glue paste brushed over the surface of the print. Care was taken that there were no creases or air bubbles.  It was left a few minutes to stretch and relax. The excess glue around the edges was then brushed off and the print placed on the concrete tile in the correct position. The cad foil was removed and the print was covered with a thin layer of tissue and stippled with a stiff brush to ensure adequate adhesion (especially on edeges and corners!)


The stone was left to dry completely and then the print surface was sealed and protected with  Aerosol spray matt varnish (or PVA)
 Excess paper around the edge of the concrete tile  (see above) was removed  with sharp scalpel.
Heres the finished print stuck on to the concrete - because the Japanese paper is so thin some of the surface texture of the concrete was visible through the paper.


10th/ 11th Feb 2016 - PROOFING AND REGISTERING


Worked on second stone (above) to proof and then to try and register on the prints already taken from the first stone. A mixture of phthalo blue litho ink and velvet noir ink was mixed but was a bit green - Added some cobalt blue -now a bit grey !!- The image took lots of proofing to come up (15 proofs!)
Registered prints initially using acetate (cadfoil) template and external registration marks made on blocks of wood wedging my stone on the bed.
Printed the stone above onto one of the first newsprint prints - Serena had a novel way of 'cheats registering' by cutting 4 triangles on the back of the print in key positions so we could position it accurately on the stone (see below)
The cut triangles were unnoticable when the stone was printed due to the pressure exerted from the press.


The first print on newsprint registered quite well using this method but the ink was a bit grey still. Added more velvet noir and burnt umber litho ink to warm it up a bit .  Printed onto both kitchen paper and newsprint prints. More accurate registration was achieved with prints on newsprint as I didn't have to dampen it (so potentially no shrinkage) I largely used the acetate template to register which seemed to work quite well.

Printed on top of some of the watercolour paper prints from the first stone -however it was much more difficult to get tight registration on these ... !!
Heres one of the more successfully registered prints 


The stone was closed by dusting ink with French Chalk - then rolling over with Non Drying Black Ink , French Chalking again and then a thin layer of Gum Arabic solution was placed.


Friday, 5 February 2016

3rd/ 4th February 2016 - RESCUING A DISAPPEARING IMAGE!

I have been working on a new stone to add greater depths of tone to the stone below.


The idea was to take the prints from the stone above and print on them again the image from the stone below.
The difficulty though will be in registering the prints accurately on the new stone!


Here's the second stone showing areas of increased tone in the alcove area of the image and on the walls behind the 2 columns.The stone was etched lightly the week before after it had been drawn. I etched it again using a variety of acid strengths (Atzol on dark areas, 50%  diluteed strength atzol on the mid tone areas and home made GA solution on the lightest areas ). The stone was rolled up with non drying ink and left to rest overnight.
However when the stone was revisited the next day the image was really pale and some of the detail originally drawn had been lost!

Serena (my tutor) had suggested taking proofs using litho ink initially. A couple of proofs were taken but things were still looking really pale ...I added some extender to try and thicken up the ink but that did n't improve things much either!
 After consulting Serena she suggested printing with some Charbonnel Velour Noir ink which is notoriously difficult to handle as it picks up every grease mark on the stone (including the ones that you dont want!) - (however any extraneous unwanted marks can be treated later with acid to remove them).
The ink does though give beautiful velvety texture and is useful in picking up any faint marks that are not behaving (like those on my stone). It was frequently used by Braque so I am in good company!

A turpsy rag smeared with the ink was wiped briskly over the stone.


The gum was washed off and a mixed combination of velvet noir and litho ink was rolled on the stone using a glazed roller. The image was still slow to appear so the stone was chalked and gummed and a thin layer of asphthaltum placed.

12 proofs were taken - rolled up slowly with velour noir- the first few were quite pale so the percentage of  velour noir ink was increased so by the time I got to the last few prints there was hardly any litho ink used and it was practically 100% velour noir.
The stone was then chalked and re inked using slow deliberate rolling. A thin layer of GA was then gently dabbed on with a sponge and then dried. Here's the gummed up stone showing a vast improvement in visible image and tone density than when we first started!


The marks produced were interesting as they were not exactly like the ones drawn. The stone was left to rest and we will proof it and register it next week.


Thursday, 4 February 2016

25th/ 27th and 28th January 2016 - Mail Art Project with Leicester University MA Curation Students

Myself, Nina (my fellow litho fellow!) Sumiko Eadon and Theo Miller ( two other artists who are also residents at LPW) spent an interesting 3 days collaborating with 20 MA Art Museum and Gallery students from Leicester University. Five students were each assigned an artist and their brief was to select a print that each artist had made and consider a means of disseminating it as a mail art project. After a short and interesting lecture by Dr Isobel Whitelegg  about the mail art movement we were divided into our groups to discuss how each artists' work might best be curated and disseminated. I had a very interesting and multinational group with 3 students originating from China another from Chile and another from Switzerland.


                                                           My group of students

I showed the students several examples of my work, (all lithographs focusing on Brutalist architecture - specifically Park Hill the Grade II * listed Sheffield council estate). The group then aimed to find fellow artists or institutions that might have a possible shared interest in my concerns with the idea of sending them a print through the post which might facilitate future dialogue or collaboration.
Here is the print they selected:


We were limited to the number of people that we could send the prints to as I only had 6 proofs of this print- so  3 arists and 3 institutions were chosen. The students came up with some text to accompany the print - a short statement and bio about myself and an email account that the recipients could respond to the work if they felt so inclined.

Our next issue was to design an envelope to send the print in and we came up with the following design:


I stuck the prints on a square of mountboard to give them some support and also blind embossed  a piece of plastic I had found which replicated the banisters of the balconies at Park Hill to give the envelope some interest.


                                    Plastic used to blind emboss a decorative border


 A brown luggage tag was added to seal the envelope and it was stamped 'Original Lithograph' using letter press and an LPW stamp.
Here is the finished product:


                              Finished product with blind embossed decorative strip and tag


The envelope was then placed in a brown envelope and posted - we will await any response with interest!


Tuesday, 19 January 2016

13/ 14 th Jan 2016 - Proofing and registering new stone and fine polishing technique using Water of Ayr stone

Registered new stone using 2 small graining stones to provide external reference points for the paper (as wanted to print proofs on paper bigger than the stone). The stones were then all strapped together to keep their positions relative to each other constant.


                                             Stone registered and ready for proofing

13 proofs were taken using newsprint, kitchen paper and Fabriano Rosepina watercolour paper and non - drying (noir a monter ink). The delicate watery tusches in the foreground printed up quite well but I had over pumiced some of the detail under the eaves on the image and was regretting my heavy handedness somewhat ! I discussed with Serena the various options in developing this image further - namely by adding colour by means of another stone/ photolithoplate/ monoprint or hand tinting with watercolour wash or by adding further tone using another stone or a photolithoplate and then adding watercolour washes. Serena showed me a copy of a wonderful book by John James Audubon  'Birds of America' - which contains 435 reproduced editions of his hand-coloured engravings which were incredible and suggested that it would be interesting to work on another stone to add more tone to the image and then hand tint the combined result.

I thus went on the hunt for a stone large enough to satisfy my requirements! Unfortunately the only one available was a one that had been kindly donated but unfortunately had n't seen the light of day for some time and was going to require some extensive graining!


            Several hours later .... once the stone was grained, Serena showed us a technique of achieving a very fine polish to the surface of the stone using a Water of Ayr stone. (A hard cylindrical whetstone often used by jewellers and watchmakers - but very difficult to purchase nowadays) She recomended using this between the medium and fine graining sequences when a detailed drawing using fine nibs was planned.


                                          Water of Ayr stone and in use below


                                 Serena demonstrating use of Water of Ayr stone

After polishing  the stone was washed, dried and then etched twice with a 1:3 diluted solution of 1:9 concentration acetic acid.

21st /22nd /28th January - Drawing on prepared stone 

I wanted to use the newly prepared stone above to add extra tone to the last stone that I had been working on. The image was traced from the first stone onto red oxide paper and transferred on to the newly prepared stone. Areas that I wanted to keep the same from the first stone were masked out on the second stone with gum arabic. I worked with turpsy tusche for the dense black areas and Korns no 4 crayon on a dabber for the lighter tones. The stone was dried, chalked and etched selectively, the dark areas treated with Atzol, mid tones treated with a 50% solution of Atzol and the light very delicate areas treated with home made Gum Arabic solution. The stone was left to rest. Here's the stone before I added the dark areas (this bit saved until last as it is the most messy!


After leaving the stone for a week the drawing still looked really pale where I had used the crayons so Serena suggested rolling it with NAM (non drying ink) slowly and carefully to try and get more of the delicate areas of drawing to take. This we did and the image looked much better on the stone. It was then left for another week to soak in .....